
How to Backup your Photoshop Settings
Photoshop Settings
Backup, Backup, Backup! That’s one of our favorite mantras at Memories Renewed. It doesn’t only apply to your photos, videos, film, and audio files, but it also applies to your custom application settings. Photoshop, as much as we love to use it, has a tendency to sometimes completely reset its settings to default without warning. This can be really frustrating if you have spent hours setting up Photoshop exactly how you like it. Backing up your preferences is as simple as copying, pasting, and renaming folders. This tutorial will walk you through how to backup your Photoshop settings on a PC in two ways. You can manually back up your preferences or use our simple Memories Renewed Photoshop Settings Utility.
Manually Backing Up
Before backing up your settings, make sure Photoshop isn’t running on your computer.
Photoshop stores its settings in the Adobe folder located in your local AppData directory. To navigate to the AppData directory, type ⊞ Win + R to open the “Run program” dialog. Then type in “%APPDATA%” and click ‘Open.’
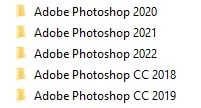
That should open a new Window to your local AppData\Roaming folder containing the Adobe folder. Within the Adobe folder you should find a folder for each version of Photoshop that you have installed on your computer.
Right-click the folder you would like to back up and select ‘Copy.’ Then right-click into the folder you would like to back up your settings to and select ‘Paste.’ If you choose to paste it in the same Adobe folder, Windows will append “- Copy” at the end of the folder name. You can right-click and choose ‘Rename’ to give it something more meaningful. I like to add the date of the backup to the end. For example: ‘Adobe Photoshop 2022 – 2022-06-16’
Manually Restoring Your Backup
Before restoring your settings, make sure Photoshop isn’t running on your computer.
Restoring your settings is just as easy as backing them up. Again, navigate to the AppData directory by typing ⊞ Win + R to open the “Run program” dialog. Then type in “%APPDATA%” and click ‘Open.’
That should open a new Window to your local AppData\Roaming folder containing the Adobe folder. Within the Adobe folder you should find a folder for each version of Photoshop that you have installed on your computer.
Right-click on the folder of the version of Photoshop you are restoring and choose ‘Rename’ and add ‘-Old’ to the end of the folder name. This is just in case something goes wrong and you need to recover those preferences. It’s safe to delete this folder once you validate that your preferences have been restored.
Then find your backed up folder, paste it into the Adobe folder, and rename it to the version of Photoshop. For example “Adobe Photoshop 2022”
Voila! Your backed up settings should now be restored. Open Photoshop and verify that all your preferences have been restored.
Memories Renewed Photoshop Settings Utility
Copying and pasting your Adobe settings folders is fairly straightforward, but if you don’t feel comfortable moving folders around yourself, using a tool to do it for you can be a bit easier.
We have written a free utility to help with this task.
Download the Utility
You can download the utility here:
Download Memories Renewed Photoshop Settings Utility
The .NET Framework 4.7.2 is required to use it.
Disclaimer: Use this tool at your own risk. We cannot be responsible for any issues you may have.
Once you have downloaded the EXE, move it to a folder where you’d store your backups. It will create and store your backups in a sub-folder named \Backups.
Using the Utility
Prior to using the utility, make sure Photoshop isn’t running on your PC.
Upon running the MRPhotoshopSettingsUtility.exe, you will be presented with a window that looks something like this:

To back up your settings, select the version of Photoshop you’d like to backup on the left side and click ‘Backup.’ This will zip up the folder, date and timestamp it for you, and store it in \Backups.
To restore settings, select the folder of the version of Photoshop you’d like to restore to on the left side, and choose the zip file of the settings you’d like to restore from the right side, then click ‘Restore.’ This will rename the existing folder on the left and append ‘-backup’ to the folder name and unzip the backed up settings to the folder selected on the left. If a folder with ‘-backup’ already exists, it will be replaced.
Please note: the version of the Photoshop folder on the left you are trying to restore and the version of the backed up settings on the right will need to match.
To clean up and delete old backed up settings, simply select them from the list and click the corresponding ‘Delete’ button. You can only delete folders on the left side that end in ‘-backup’.
Summary
Backing up your Photoshop settings manually or automatically by using Memories Renewed‘s utility can be a lifesaver. Be sure to back up your settings often, you never know when you’ll need it!

