How To Archive Your Facebook Photos
Archive Your Facebook Photos, Posts, and Other Data
When Facebook has an outage it is a reminder that we have little control over our own data that we share on 3rd party sites. If you use Facebook like a lot of others do, it is the primary place where you share your most treasured photos and memories. Archiving your Facebook data should be something that everyone does on a regular basis. It is also good to know how to do in the event that you lose a loved one that used Facebook and you would like a way to preserve their data.
Archiving your data off of Facebook is a lot easier than most people think. You don’t need to download each individual photo or post. However, Facebook does makes it deceptively hidden from you.
Here’s a quick step-by-step guide to archiving your Facebook data. This guide is meant for the desktop version of Facebook, and not mobile.
Account Settings
First, you need to login to the Facebook account that you would like to archive. Once you are logged in, look for the little triangle icon in the top right of the page.
Click the triangle and choose the ‘Settings’ option.
Your Facebook Information
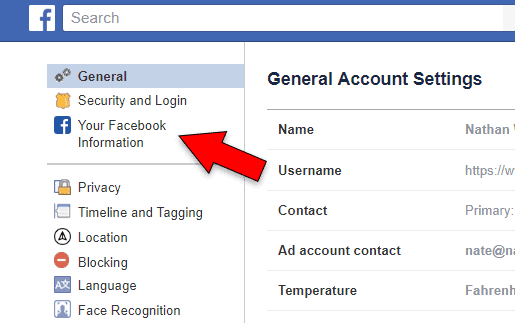
From there, Click on the third option down on the left. “Your Facebook Information”
Download Your Facebook Information
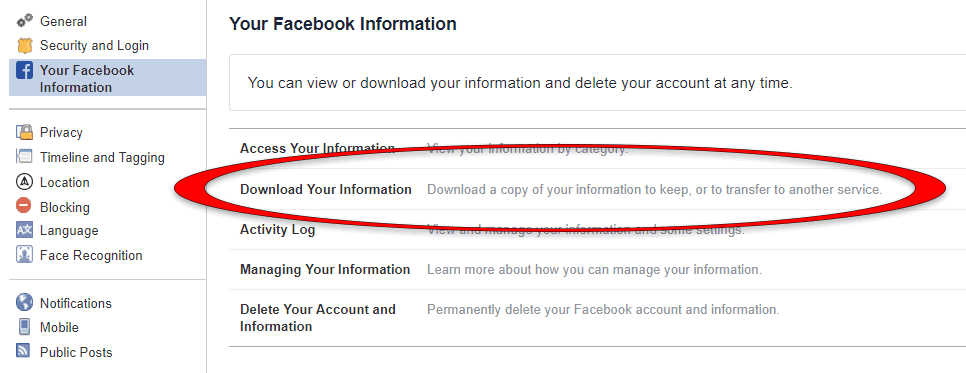
That will bring up options to View your info, Download your info, etc.
Choose the Download your information option.
File Information
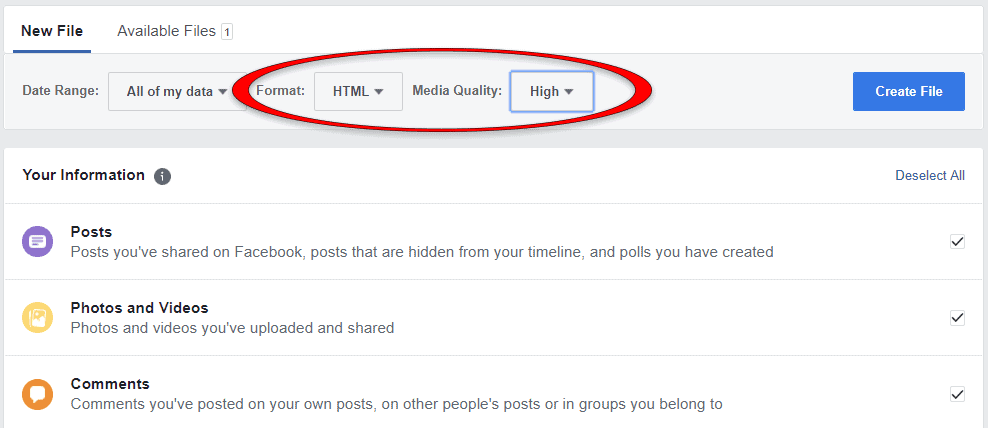
Then Facebook will ask you for a date range and what format to download your data in. Use the HTML format and change the Media Quality option to High. It will default to Medium, so be sure to change it to High.
You’ll also be presented with a list of options for what data you would like to download. Deselect any things you have no interest in saving. And click the ‘Create File’ button.
File Creation
Then comes the waiting game. Depending on how much data you have on your Facebook account, it can take a day or two to create a file for you to download. Facebook is very vague and says it will take ‘a few days’, but in my experience it is ready within 24 hours. You will receive an email as well as a Facebook notification when your file is ready to be downloaded. The file is only available for download for another vague ‘few days’, so be sure to keep an eye out for the notification and download it ASAP.
Download File and Organize Data
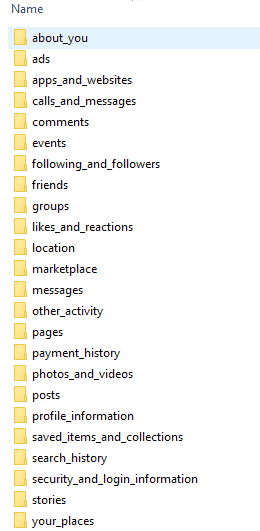
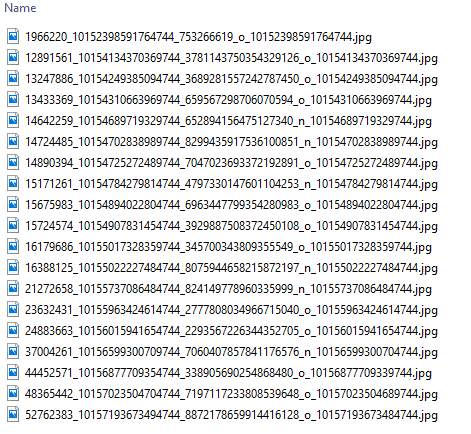
Once you have downloaded your ZIP file of your data in HTML format, extract the contents and you’ll have a folder for each category containing all the files of your Facebook data. The filenames are not very friendly as you can see. You can use an image viewer like FastStone to sort and organize your files.
Finished
Congratulations! You have all your Facebook data downloaded and archived!
Now next time Facebook goes offline or removes your data on purpose or accidentally, you’ll have an archived copy of all your data!

