How to Sort Your Images

Image Sorting and File Renaming
You have your photos all digitized! Great! Now it’s time to organize them digitally! For the tech savvy, this is a simple task, but for the rest of us, it can be a little daunting. Here’s a tutorial that you may find useful when organizing your digital collection that will show you how to sort images visually.
Most of us can create new folders and organize files into groups that way, but one common task that clients ask for help with is how to reorder and rename their image files and have them stay in that particular order. This short tutorial will show you how to sort your images with minimal effort.
FastStone Image Viewer
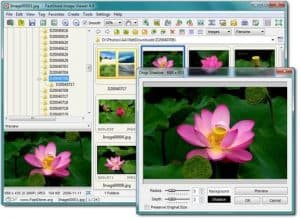
A powerful program that makes image management tasks easier, is called FastStone. It is free for personal use, contains no adware, spyware or nagware. It is available for the Windows platform only, and is available for download here.
Disclaimer: Backup, Backup, Backup.
Before doing any organizing or making changes to your files, make sure you have a copy to revert back to in case something unintentional happens.
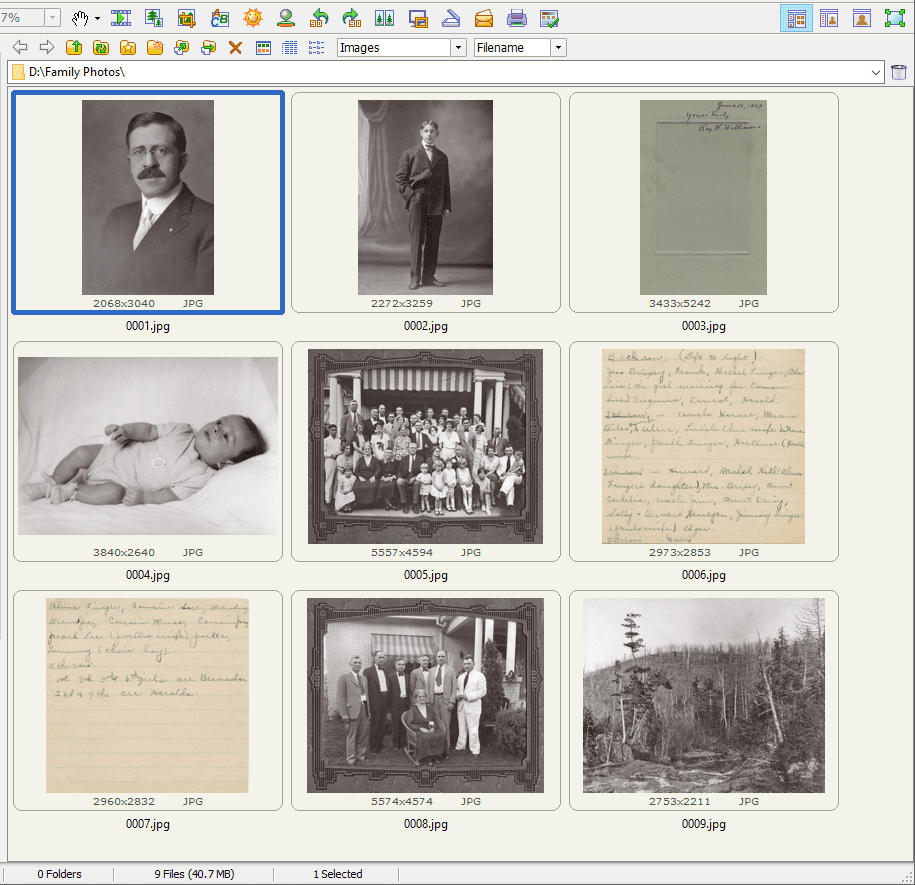
Step 1. Thumbnail View
Once you start up FastStone, navigate to the folder containing the images you’d like to place in a new order and turn on the thumbnail view. There is a setting, under Settings, to increase the size of your thumbnails to make it easier to view the images.
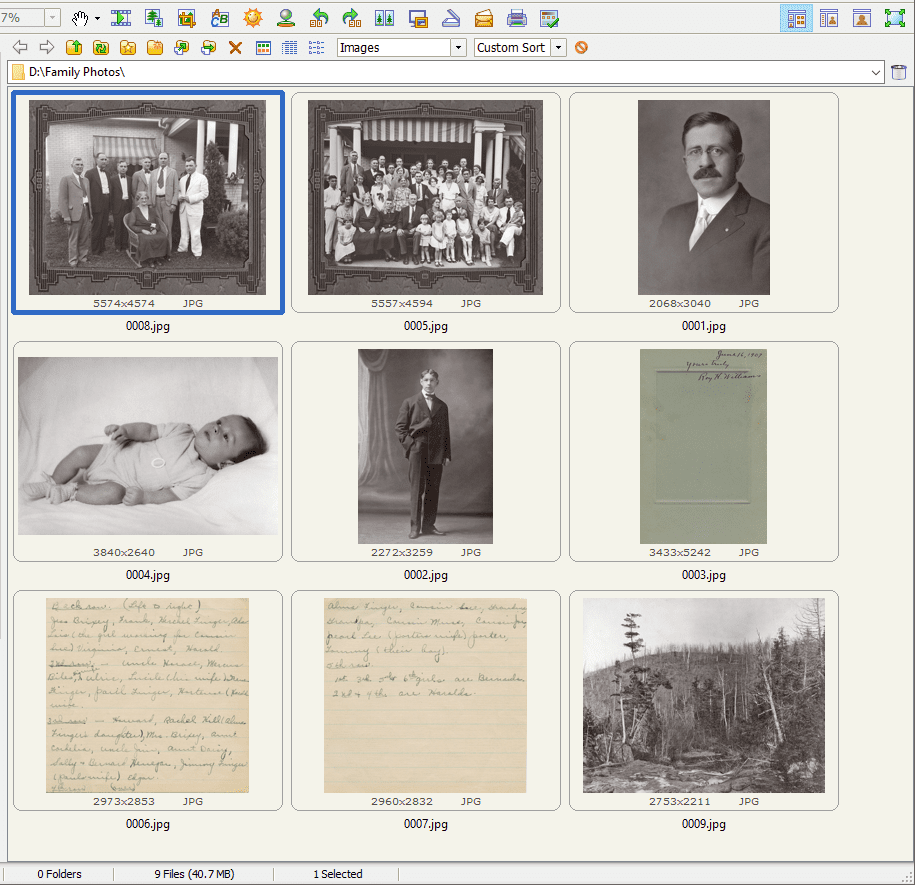
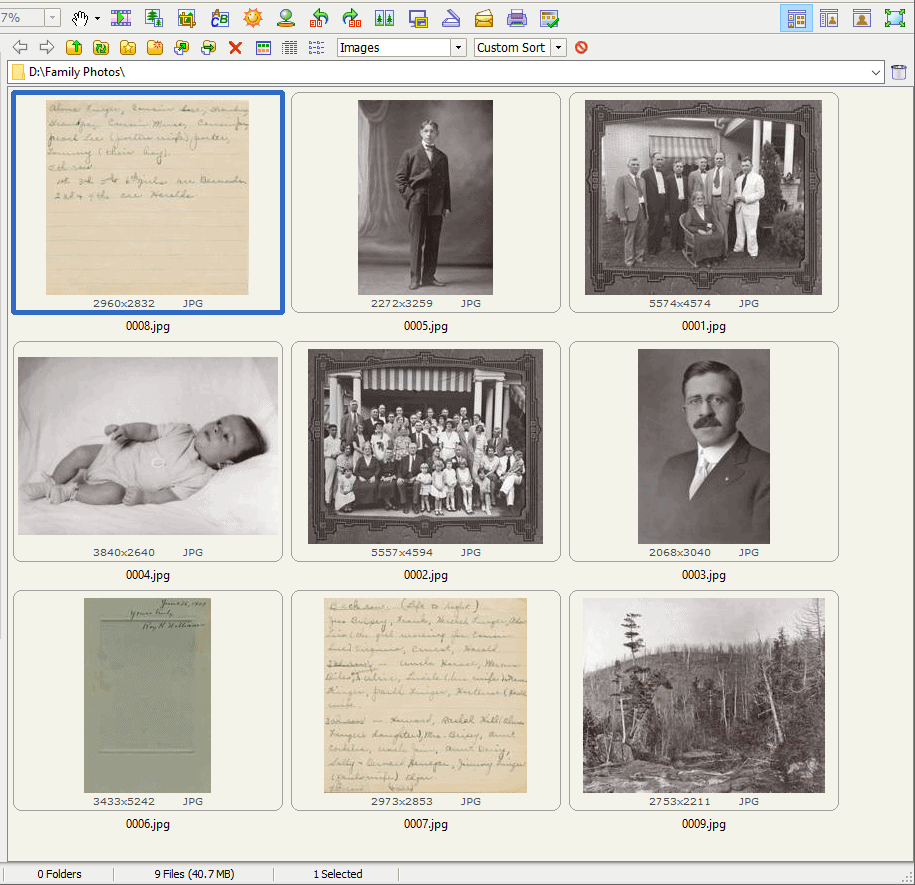
Step 2. Drag and Drop Images
Now drag and drop the image thumbnails around and put them into position. Notice in our example screenshot, we’ve moved the two group shots to the beginning of the sequence and moved the baby photo. You will also notice after you drag and drop your first image, the sort order on the toolbar will now show ‘Custom Sort’ instead of the default of ‘Filename’.
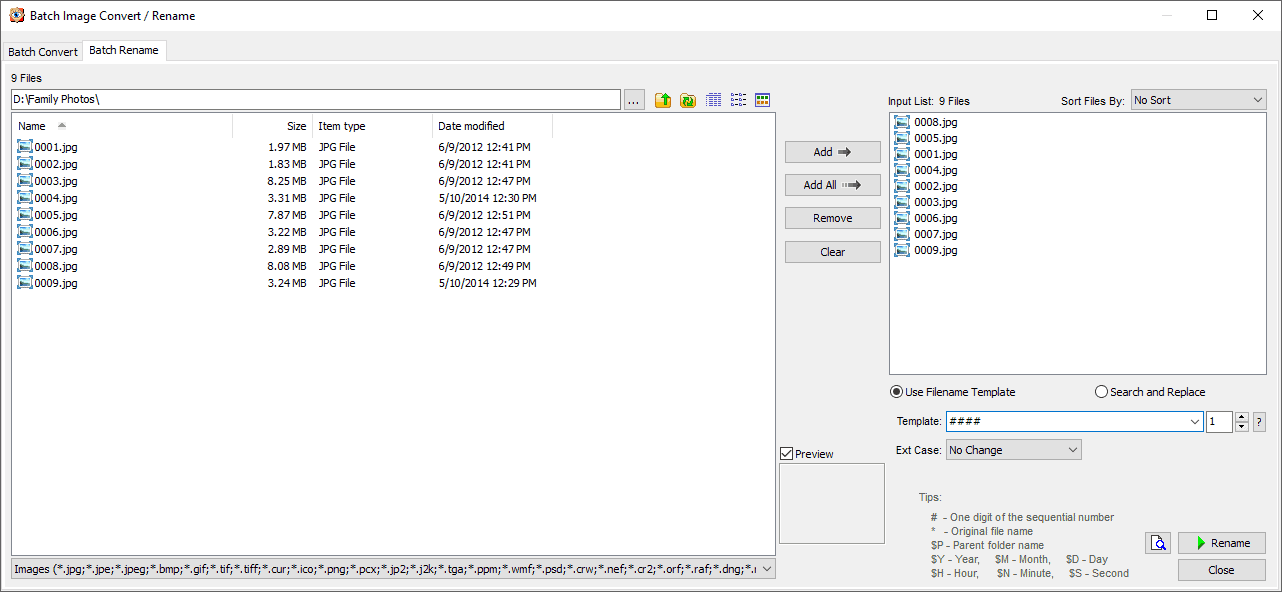
Step 3. Start Batch Renamer
After the photos are arranged in the order you want, type CTRL-A to select all your images. They should be highlighted with a blue outline. Then type F4, or choose from the Tools menu, “Batch Rename Selected Files”. That will launch a window where you can setup your file naming template. In this example, for simplicity sake, we are using a template of #### to pad our filenames to 4 digits and we’ll begin at 1.
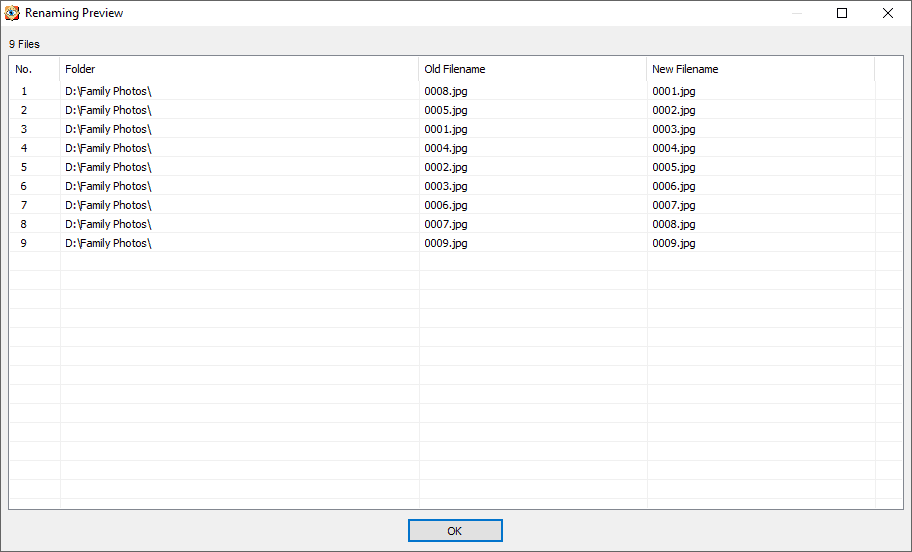
Step 4. Preview your Changes
Before you click the big Rename button, it’s always a good idea to first check your work before the final commit. Just left of the Rename button is a preview button that will do just that.
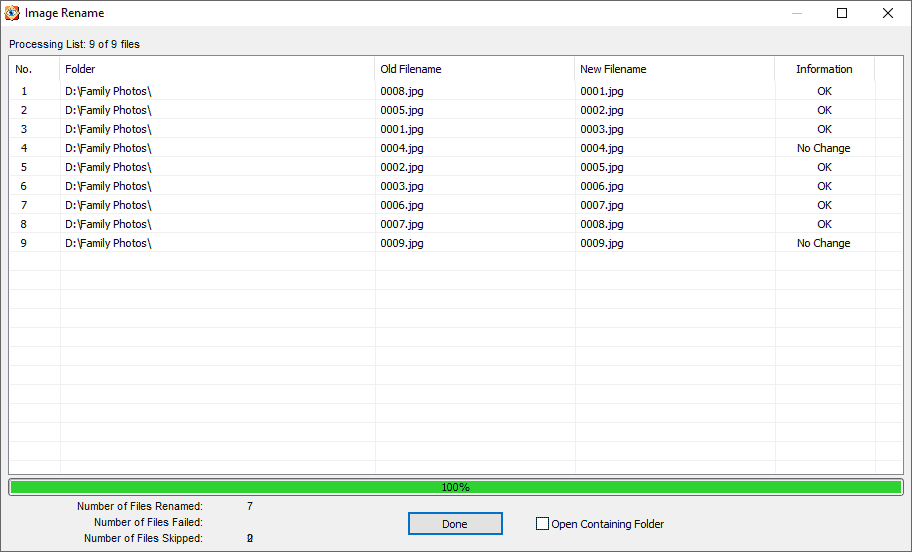
Step 5. Rename the Images
Now that you’ve verified everything looked good in the preview, go ahead and click the Rename button and watch the magic happen!
Step 6. Turn off Custom Sort
After you’ve renamed your files, you’ll be brought back to your thumbnail view of your images. However, everything will look messed up! That’s because FastStone is still in the Custom Sort mode and not sorting by the default of Filename. Click on the red crossed out circle next to Custom Sort to turn off Custom Sort.
Step 7. Verify Results
After Custom Sort mode is off, your image filenames should now match your new arrangment. Congratulations! You’ve now put your images in a whole new and logical order with ease!

Summary
FastStone is just one of many tools available that can help you organize your photo collection digitally. FastStone’s functionality goes way beyond what is covered in this short tutorial but hopefully this comes in handy when you are trying to rename your files.

